how to install series

Installing your new Delta® Alcove Shower Base may seem like a large task, but all it takes is attention to detail and following these steps. And after that, you’ll be well on your way to enjoying your new shower.

Tools and Supplies Needed

  • Drill
  • Safety glasses
  • Caulk gun
  • Adhesive
  • Sealant
  • Tape measure
  • Level 
  • Square
  • Shims
  • Drop cloth
  • Pencil
  • Hole saw
  • Screws
  • Extension bit holder
  • Drill bits
  • Driver bit
  • Shower drain assembly
take measurements

Step 1: Take Measurements

First, measure the width and depth of your alcove to make sure that the shower base will fit. You won’t get very far if the space isn’t the right size!

To make sure the shower base and the rest of your shower wall coverings fit, use a level horizontally on the surface to see if it is level and vertically on the walls to see if they are plumb. Next, grab your carpenter’s square and put it into the back corner of your walls, making sure that it is contacting evenly along both edges of the square.

dry fit shower pan

Step 2: Dry Fit Shower base

Having your drain at the right height is key so refer to your instruction manual for what that height needs to be. Then, you will need to make sure your drain is in the right location for your shower base. To check this, dry fit your shower base.

Place your shower base down in your alcove and push it tight into the back wall and corner. Confirm the front and all four sides are level before tracing through the drain hole with a pencil to see where the drain needs to be. 

When you dry fit your shower base, you can make some other marks that will be helpful to you later on. You’ll need some pilot holes through the flange at each stud location to hold everything in place; make a mark with a pencil in the center of both the flange and stud and repeat for each stud location.

Finally, make a line on the floor across the front of your shower base. Then, you can remove your shower base. 

drill pilot holes

Step 3: Drill Pilot Holes

Now that you’ve removed your shower base from the alcove, it’s time to drill the pilot holes that you previously marked. It’s important to completely remove the shower base from the alcove so that you don’t drill holes into your studs at this time.

Grab your drill with a 3/16” bit. We recommend putting an extended bit on it as well to help avoid damaging the finish of your shower base. Drill all your pilot holes in the flange where you made your pencil marks.

Before you glue anything together, verify your drain is the right height and in the right place. Dry fit your shower base into the alcove one last time and make sure it looks good. Go ahead and pull the shower base out again so you can glue your plumbing connections and move onto the next step.

spread adhesive

Step 4: Spread Adhesive

Once your drain is installed, it’s time to put in your shower base for good.  Check that your subfloor is clear of debris and then begin applying adhesive. Spread your adhesive evenly with a notch trowel, but make sure you don’t go beyond the pencil line you drew in front. 

With the adhesive spread evenly, lay down your shower base. Use a level to make sure all four sides are still level.

secure shower pan to wall

Step 5: Secure Shower Base to Wall

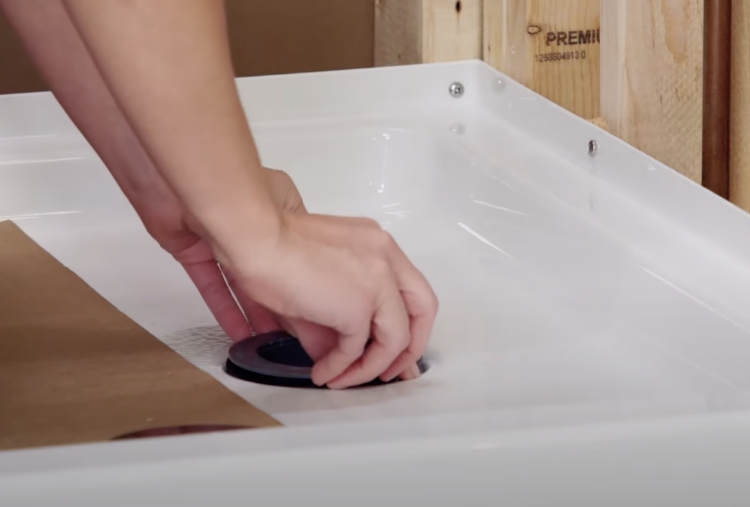
With your shower base in place, it’s time to secure it to the wall. First, we recommend laying down a few pieces of cardboard so that you protect the surface of the base and prevent losing things down the drain.

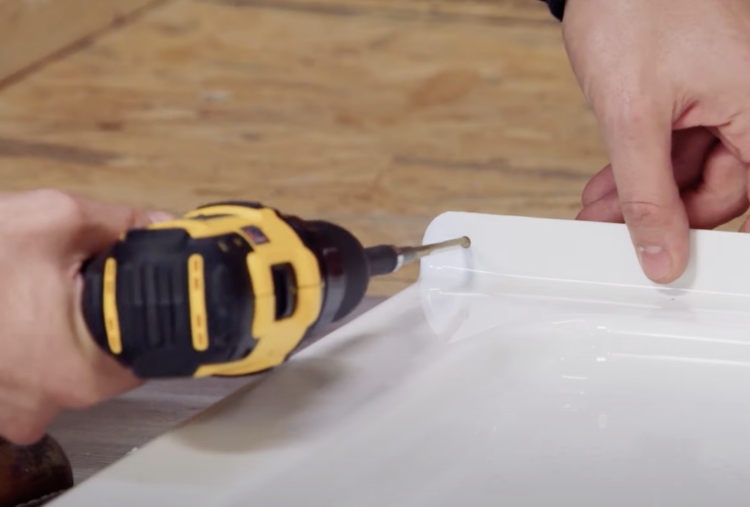
When screwing your flange into your studs, be sure to use round or panhead screws, not flathead, to avoid causing damage to your flange. Add a drill bit extender to your drill for extra help to avoid causing damage to the flange. Finally, before you drill, check if you have any gaps between your flange and your stud wall and if you have one ⅛” or more, add some shims to close the gap. 

Then, you’re ready to drill. These don’t need to be super tight, just enough to hold it in place. Repeat for all stud locations.

install drain

Step 6: Install Drain

Finish off your new shower base by installing your drain. If your drain didn’t come with a gasket, you can use acrylic or latex caulk, but don’t use plumbers putty as it can damage the base. 

If your drain did come with a gasket, put it on the drain and screw it until it’s tight. Then, snap your drain cover in place and you're done!

Be sure to allow your sealants and adhesives time to cure according to the manufacturer’s instructions.